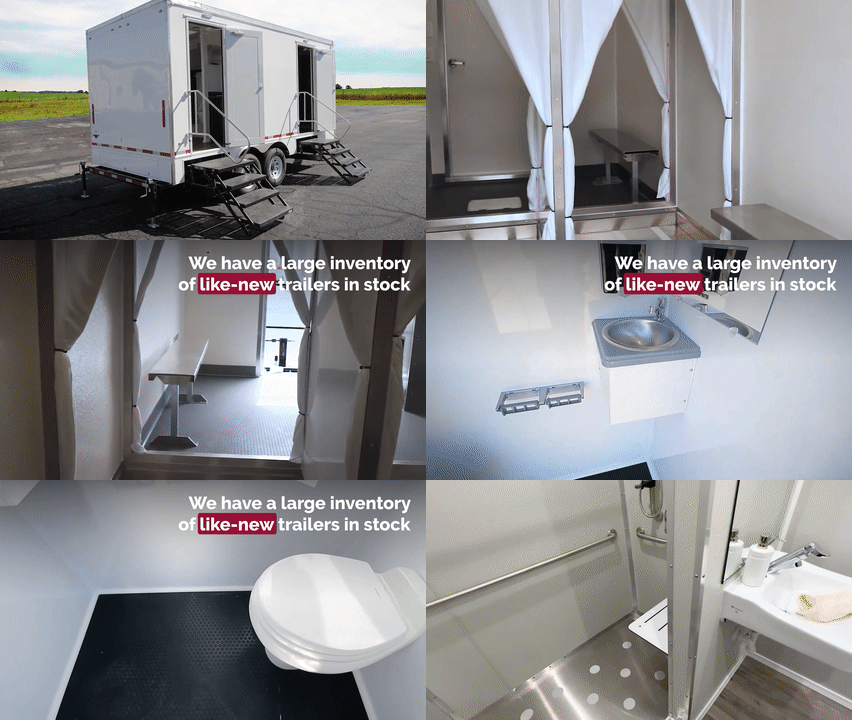
USED RESTROOM TRAILERS FOR SALE OR RENT
Looking for a cost-effective solution for your sanitation needs? Our certified pre-owned restroom and shower trailers provide the perfect balance of quality and savings.
Why choose our pre-owned trailers?
- High quality: Every unit is 20-point inspection certified for reliability.
- Budget-friendly: Save significantly compared to purchasing new.
- Versatile options: Suitable for a wide range of applications and budgets.
Get the benefits of a durable restroom trailer without the high price tag. Find your ideal pre-owned solution today!


WE HAVE A LARGE INVENTORY OF LIKE-NEW TRAILERS IN STOCK


CERTIFIED FOR PEACE OF MIND
Buying used does NOT mean you’re compromising on quality. Our 20-point used trailer certification process should make you 100% confident in your purchase. Every used portable restroom trailer must pass our rigorous inspection to become certified. As a trusted restroom trailer provider known for exceptional customer service and commitment to quality, you’ll have peace of mind knowing you’re working with a reputable company.
FINANCING OPTIONS AVAILABLE
Portable Restroom Trailers offer flexible financing options to make the purchase more accessible. Our team can discuss the best options available and help you choose the restroom trailer that suits your needs and budget.


AFFORDABLE, TURNKEY RESTROOM TRAILER SOLUTIONS
Used portable restroom trailers provide the convenience of additional restroom facilities at a deeply discounted price compared to new trailers. Our team will not only help you choose the right trailer, but we can also deliver and set up your trailer so it’s ready to go from day one. Need help maintaining, troubleshooting, or winterizing your trailer? Check out our online resources or give us a call for assistance!
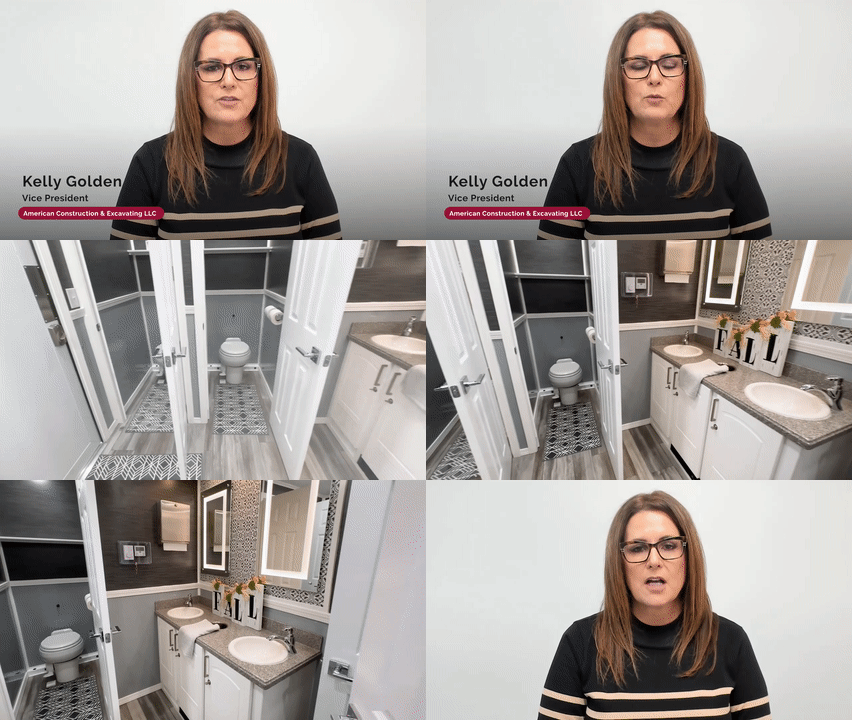
Meet the Experts
KELLY GOLDEN VICE PRESIDENT

PRE-OWNED TRAILER FAQS
Congratulations on your used trailer! Whether you need a mobile laundry trailer or bunkhouse trailer for disaster relief efforts, a restroom trailer for large-scale events or job sites, or a shower trailer for festivals or campgrounds, ensuring proper setup and maintenance will help maximize its reliability, performance, and longevity.
While every pre-owned trailer is inspected and tested before delivery, understanding how to set up, operate, and maintain your trailer properly is key to getting the most out of your purchase. We’ve designed this FAQ to answer common questions about your trailer’s arrival, setup, maintenance, and troubleshooting.
If you have additional questions, do not hesitate to reach out to our support staff—through our iOS or Android app, our website’s LiveChat, or by email or phone—we are here to help ensure your trailer is ready for use and performs at its best.
Arrival, Setup, and Initial Inspection FAQs
No. Transport delivery drivers do not set up trailers.
If you need setup assistance, please coordinate with your sales representative. We offer a done-for-you setup service, but you must schedule ahead of delivery.
For setup directions, we’ll happily schedule a call with one of our technicians to guide you.
To ensure a smooth setup and full functionality of your trailer, you’ll need to select an accessible delivery location with a solid surface, level ground, and access to proper electrical and water connections:
- Electrical Requirements: A main power source within 30 feet of the trailer is required to prevent damage to the air conditioning, heating, and other electrical systems. Depending on the trailer model, you will need between one and four dedicated 30-amp 120V circuits to power all features efficiently.
- Water Requirements: A water source with 30-50 psi must be available within 50 feet of the trailer location. A standard ¾-inch heated garden hose fitting and a garden hose are required to supply water to the trailer.
Important Note for a Pre-Scheduled Setup Service: Electrical and water connections must be ready for a complete setup at delivery. We cannot fully set up the trailer if utilities are unavailable, so you may be required to reschedule.
Always confirm requirements for your trailer’s setup with your sales representative before delivery—certain units have additional needs, like decon trailers that need hardwired 240V power supplies.
-
Ensure you have the necessary keys for doors and cabinets. Even trailers with keyless entry will include some backup keys.
- Important Note for Keyless Entry Locks: Your trailer will come with a default four-digit code (usually the current year). The trailer’s manual, typically in the mechanic’s or utility room, provides instructions on setting your own code.
Locate and read the trailer’s manuals. Each trailer has specific setup instructions—always follow the manufacturer’s directions.
Contact your sales representative if the trailer’s manual is missing or if you need a digital copy.
-
Follow the “test it now” rule to confirm everything is functioning correctly before using it.
- Important Note for Winterized Trailers: Before your trailer, see “Should I test my trailer immediately if it is winterized?”
Before leaving our facility, every pre-owned trailer undergoes a full inspection with water and power connections. However, you will still want to conduct a visual inspection inside and out and connect to water and power to test your trailer as soon as possible.
The only exception to this is when your trailer is winterized:
- Leave it winterized if you do not plan on using it until temperatures are consistently above freezing.
- Only perform the visual inspection and complete the full equipment test in the spring.
- If you opt to go ahead with the entire inspection, you will need to winterize it again afterward if temperatures remain low.
Important Note: We clean all trailers before shipping, but dust or dirt may accumulate during transport. We recommend a quick wipe-down before use.
Here is a step-by-step guide to help you assess the exterior of your trailer:
1. Check Your Trailer Body and Frame
Walk around your trailer and inspect the exterior walls, roof, and undercarriage for any visible damage. Watch for dents, cracks, rust, or chipped paint that may have occurred during transport. Check that all exterior doors and compartments are correctly aligned and can close securely.
2. Inspect the Roof
If possible, use a ladder or elevated surface to examine the roof for cracks, leaks, or loose seals. Look for signs of wear around roof vents, skylights, or seams where water might seep in.
3. Examine the Tires and Axles
Ensure the tires are in good condition, properly inflated, and free of visible damage or excessive wear. Check lug nuts and wheel hubs for tightness and security. Inspect the axles and suspension for signs of rust or damage.
4. Test Exterior Lighting
Turn on your trailer’s running lights, brake lights, and turn signals to confirm they are operational. If lights do not turn on, check the power source or replace bulbs if needed.
5. Inspect the Power Connection and Generator (If Equipped)
Assess the trailer’s external power connection for any damage to the plug or cord. If your trailer has a generator, check for fuel levels, oil levels, and any visible leaks.
6. Check Propane Tanks and Water Heaters (If Equipped)
Inspect propane tanks for leaks, corrosion, and secure fittings. Ensure the water heater is intact and confirm that gas lines are connected properly.
7. Inspect the Waste and Freshwater Systems
Check for cracks or leaks in the waste and freshwater tanks. Make sure all valves are functioning correctly and closed before transport. Inspect the waste tank outlet for any debris or obstructions.
8. Verify the Stability of Entry Steps and Handrails
Ensure that steps fold out properly and are secure when in use. Check that handrails are sturdy and firmly attached.
9. Document Any Issues
If you find any issues, please take photos and report them to our customer support immediately. Address any minor repairs or adjustments before transporting or putting your trailer into service.
Here is a 5-step walkthrough to help you inspect the interior of your trailer:
1. Check the Walls, Ceiling, and Flooring
Look for water stains, cracks, or damage to the walls or ceiling that may indicate leaks. Ensure flooring is in good condition with no loose tiles, cracks, or soft spots. Verify that cabinets and storage areas are secure and doors close properly.
2. Inspect the Restroom and Plumbing System
Check the sinks, toilets, urinals, showers, or washers for any leaks or loose fittings. Look under the sink and near plumbing connections for any visible leaks or water damage.
Be mindful not to flush antifreeze out if your trailer is winterized.
3. Verify Safety Equipment
Confirm that fire extinguishers, smoke detectors, and carbon monoxide detectors are in place and operational.
Especially in ADA bathroom trailers, assess handrails inside restroom stalls for guest safety.
4. Ensure Door Locks and Latches Work Properly
Test all interior and exterior door locks for smooth operation. If your trailer has a keyless entry system, verify that the code works and reset it if needed.
5. Check for Any Missing Accessories or Parts and Report Issues
Make sure all keys, manuals, and removable components are present. If anything is missing or damaged, please make a note and contact your sales representative.
Always address any minor issues before transporting or using your trailer.
Yes—During transport, vibrations and movement can occasionally cause some plumbing fittings to loosen. We do not over-tighten fittings before shipping to prevent breakage. A simple tightening should resolve the issue if you notice minor leaks or loose connections.
Only connect your trailer to power and water if temperatures allow, and it’s not winterized. You’re going to want to turn on all major systems—lighting, plumbing, climate control, and appliances—to verify everything is working.
Consult your trailer’s manual for each element's start-up directions and check they’re all in working order:
Electrical System
Turn on the lights, ventilation fans, and outlets to confirm they work. If your trailer has emergency lighting or exit signs, ensure they are operational.
Check for loose wiring, exposed cables, or flickering lights. If your trailer has Bluetooth speakers, a fireplace, climate control, or other additional features, test their functionality.
Hot Water Heater
Never connect electricity or water without reading the trailer’s manual. Incorrect startup can burn out the heater.
Propane Water Heater
Ensure you have propane, check for leaks, and fill the water heater with water before starting to prevent damage.
Waterless Urinal (If Restroom Trailer is Equipped)
Many of our luxury restroom trailers include a waterless urinal. If your trailer includes a waterless urinal, ensure the urinal cartridge–usually a Sloan one—is properly installed and replace it every 3-6 months based on usage.
Waste Holding Tank and Flushing System (For Portable Restrooms)
Before use, the waste tank must be “charged” by completely covering the bottom of the tank with roughly a ½ inch of fresh water and 1-2 deodorizing packets per toilet.
Skipping this step can cause waste buildup under the toilets, leading to mounding issues. Check for any odors that may indicate improper waste tank maintenance.
Open and close the toilet flush valve to ensure it operates smoothly. Run water through the sinks and shower in your trailer to confirm proper flow and drainage.
Heating and Air Conditioning Systems (If Equipped)
Turn on the heater and air conditioning unit to ensure they function properly. Check vents for proper airflow and listen for any unusual noises.
Not all trailers come equipped with the Smarter Restrooms Mobile App or Starlink satellite-based internet by default. These features are available as optional upgrades on select models.
If your trailer includes the Smarter Restrooms Mobile App, you will find activation instructions and a product key code inside the trailer’s manual. This app allows you to remotely monitor waste tank levels, control climate settings, and track power usage for improved efficiency and maintenance.
Some trailers are pre-equipped or pre-wired for Starlink, allowing for high-speed, low-latency internet access even in remote locations. If your trailer includes Starlink, we’ll provide setup instructions in your documentation. If not, you can often add Starlink as an upgrade, depending on your trailer’s configuration.
If you are unsure whether your trailer has these features or would like to explore upgrade options, contact your sales representative for more details.
Follow a routine maintenance schedule to prevent waste buildup. Regularly empty and sanitize the tank to keep it functioning efficiently.
Winterization and Cold Weather Use FAQs
It’s RV antifreeze used to winterize your trailer, protecting water lines, sinks, toilets, and the water heater from freezing temperatures during transport.
- If you receive your trailer in mid-winter and do not plan to use it until spring, it is best to leave it winterized and perform only a visual inspection inside and out. Wait until temperatures rise before connecting water and power.
- If you do test your trailer, you must re-winterize after testing if temperatures are still below freezing.
Yes. Anytime your trailer is not connected to power to operate heaters in freezing conditions, it must be winterized to prevent costly damage.
Title, Registration, and Documentation FAQs
Your Bill of Sale is provided at the time of purchase, so you should already have this document—keep it safe.
Your MSO/Title will arrive 14-28 business days after delivery to the business address on your Bill of Sale. UPS will require a signature upon delivery.
This document is like any other title for a vehicle and is essential for registering, obtaining plates, reselling, or proving ownership of your trailer.
Troubleshooting and Technical Support FAQs
- While pre-owned trailers are sold as-is with no warranty, technical support is still available.
- Our team can answer questions, help troubleshoot issues, recommend repair services in your area, and direct you to parts lists and suppliers.
Visit our YouTube channel for tutorials, winterization guides, and setup tips.
Additional Resources: Contact your sales representative, or call or email our support team for quick guide info sheets on:
- Generator operation
- Electrical setup
- Waste tank maintenance
- Direct-to-sewer options
- Routine servicing schedules