April 25, 2024
Building a Better Workplace: Restroom Importance During Construction
When preparing for your next big project, be it a new build, a demolition, or a renovation, there is a lot to consider.
Picture this: Timeline, contractors, permits, safety, and more are all swirling through your mind as you head to the job site for the first time.
You start your day off well with a few progress meetings and a run-through with the architect and the project superintendent, and then you find yourself needing to use the restroom––only there is nowhere to go. See, you may have forgotten to consider where you and your workers would use the restroom. And now, you’re in a bit of a pickle, especially if you rushed for the quick fix of the dreaded porta potties.
To help you avoid this mistake on your next project, we wanted to explain why restrooms, especially the type, are so important.
Increased Availability, Convenience, and Time-Saving
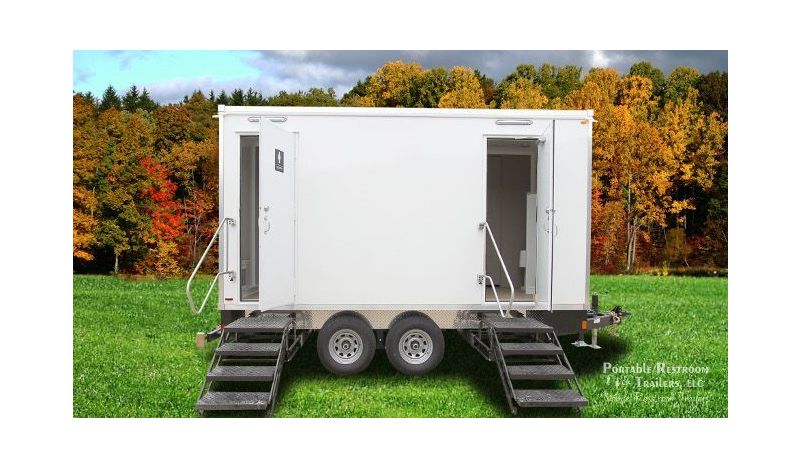
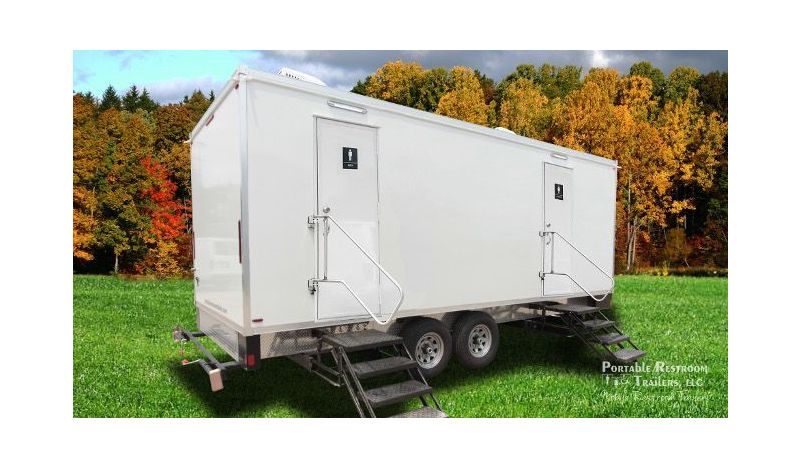
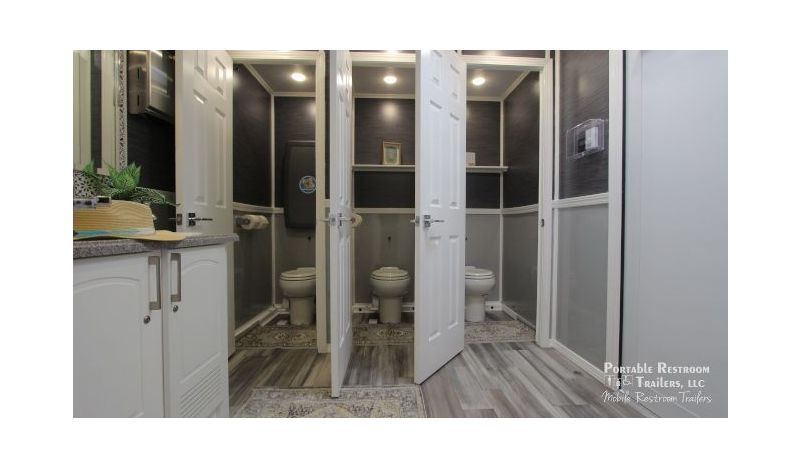
If you are working on a new build or demolition project, you likely won’t have access to a restroom in your building–because there really isn’t a building. When considering restroom facilities before a project, you may realize you don’t have one built in. Mobile restroom trailer rentals are a great choice because you can bring the restroom to you when there isn’t one already available.
With so many workers needing to answer nature's call, likely more than once a day, constant lines and waiting for those individual porta potties can add up to a lot of wasted time. Restroom trailers can accommodate up to an entire crew at one time (depending on the crew size and your trailer rental), saving valuable work time.
A nearby, accessible facility can save time, make your site more efficient, and make things way more convenient for all of you. Now, you can go when needed and not plan your bathroom schedule around meetings, tasks, and everyone else’s toilet schedule.
Enhanced Comfort and Health
We all know it to be true, but we must say it anyway: It isn’t good to hold it. Please ensure facilities are nearby for the sake of your and your workers' health. Beyond having a toilet close by, ensure it’s comfortable. Construction can often be a rugged, outdoor job. Those plastic porta potties can be icy during the winter months and blazing hot and smelly during the summer jobs. Some may choose to avoid that option at all costs.
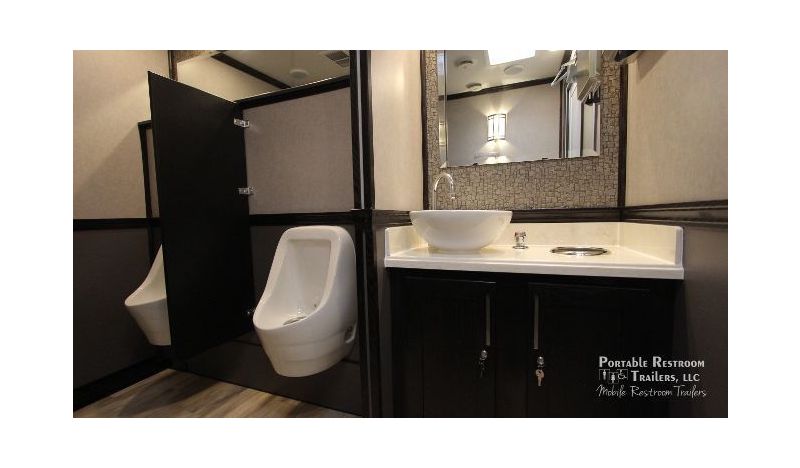
Portable restroom trailers also offer a more comfortable and sanitary option in the market of restroom alternatives. Flushing toilets and good ventilation in the unit prevent bacteria from stagnating in the air. Hand wash stations with soap, running water, and paper towel dispensers keep germs at bay on the site. Insulation, heating, and air conditioning options make using the toilets a comfort break in all senses of the word. This keeps you and your workers safe and healthy, which can prevent projects from being delayed by widespread sickness.
Additionally, when working on projects involving harmful substances, mobile decontamination trailers are available and a great choice to get you and your workers clean as quickly and efficiently as possible. Because you can position these where you need them, people do not have to travel far carrying contaminants to get clean, which protects you, the public, and nature.
OSHA
Everyone's favorite workplace administration has guidelines for everything to keep you and your workers safe. From acceptable hard hats to high-visibility vests to secure ladders, it is essential to follow OSHA guidelines to ensure legal compliance and smooth sailing on the project. One of the guidelines they lay out is, yes, about restrooms.
OSHA guidelines on restroom and sanitation requirements determine that employers have to ensure that everyone has access to the restroom and that there are facilities for both genders.
It also calls for enough facilities to prevent large lines from forming to access the bathrooms. Portable restroom trailers can accommodate a range of group sizes, from single station units up to 14 or more. This allows you and your workers to spend less time lining up for the toilets and more time getting work done.
Morale
Let’s be honest, everyone feels better when they aren’t thinking about how badly they need to use the restroom. Providing restrooms near your site makes sure that you all find relief faster and get back to thinking about what’s really important on the site.
Plus, everyone will be happier for saving the energy it takes to complete the quest to a far-off porta potty with a line forming. A happy job site is a more efficient one, and having accessible toilet facilities makes everyone happy.
It is important to remember that toilet availability is vital on job sites. Easy access to facilities keeps workers happy and healthy and allows projects to run smoothly. Portable bathroom trailers are a great way to keep toilets close, and they’ll add to the professional image of your site to your clients and your employees. Your crew will feel valued and respected when you provide high-quality facilities, increasing morale and job satisfaction.
Read More